Imagine this: You’ve just sent out a batch of invoices through QuickBooks Desktop, but you’re suddenly hit with a pang of anxiety. Did those emails actually go through? Did your clients or vendors receive their invoices? Your workflow grinds to a halt as you scramble to find some way to confirm the delivery of those critical documents. Cue: QuickBooks Desktop tutorial.
“Did I forget to send this email?”
We’ve all been there. The uneasy feeling that something important might have slipped through the cracks. What if your clients never received their invoices? What if vendors are left wondering where their payment requests went?
The stress can be overwhelming, creating a cascade of worries:
- Missed payments: If clients don’t receive their invoices, payments could be delayed, affecting your cash flow.
- Damaged relationships: Frequent follow-ups or disputed invoices due to non-receipt can strain client/vendor relationships.
- Record-keeping nightmares: Without a clear paper trail, your audit logs become messy, making it difficult to track communications.
- Unresolved disputes: If a client claims they never received an invoice, how can you prove otherwise without a sent email record?
Tutorial time: View vendor and client emails sent from QuickBooks Desktop
Thankfully, QuickBooks Desktop offers a way to retrieve and review sent emails, providing you the peace of mind that your communications are reaching their destinations.
Here’s our easy, step-by-step tutorial:
1. Open QuickBooks Desktop: Launch your QuickBooks Desktop application and log in with your credentials.
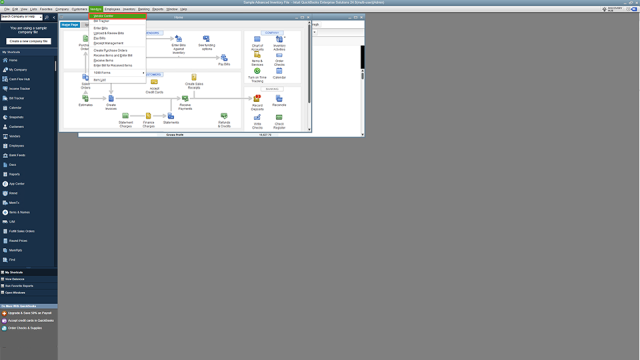
2. Navigate to the Customer or Vendor center: Depending on whether you sent invoices to customers or payment requests to vendors, go to the appropriate center. (We’ll use Vendor center screenshots in this tutorial, but the steps in the Customer center are identical.)

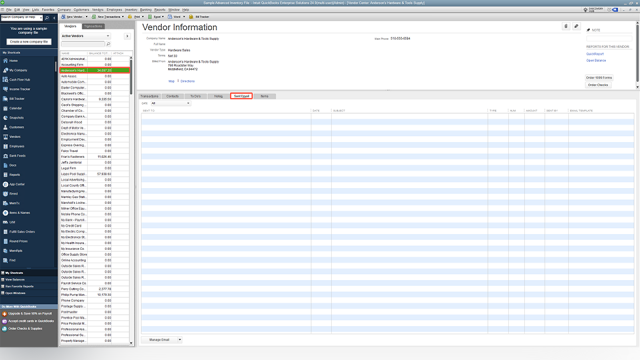
3. Locate the client or vendor: Scroll or use the search bar, then click on the vendor or customer’s name to open their profile.
4. View sent emails: Click the Sent Email tab to view every email you’ve sent to that vendor or customer from QuickBooks Desktop.

How to update your vendor or client’s profile
“What if I need to update my client or vendor’s email address?”
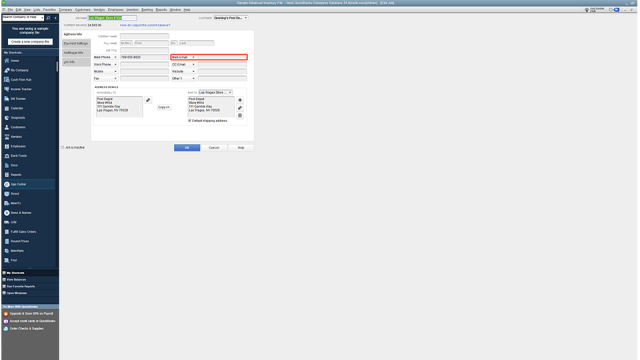
- Open the customer or vendor’s profile: Follow the directions above to access their profile. Once there, click the pencil icon in the upper right-hand corner.
- Edit their profile: The Main Email field is where you’ll want to verify their email address is correct. Update that field as needed (and while you’re there, double-check that the rest of their profile’s information is correct, too).
- Click OK.

One last QuickBooks Desktop tip…
By regularly reviewing the emails sent from QuickBooks Desktop, you can ensure proper delivery, maintain organized records and quickly resolve any miscommunications.
And if managing QuickBooks Desktop feels like another layer of complexity, consider QuickBooks Desktop hosting. Hosting services offer enhanced accessibility, increased data security and real-time collaboration features, making it easier to stay on top of your financial communications from anywhere, at any time.
For more information on QuickBooks Desktop hosting, click here. For more how-to and tutorial content, subscribe to our blog today.

